


not a lot but some and it was welcome :)
It seems so long ago, but this morning Lucy spent time like this,

Ker-Ching-ing everything as she zoomed by on her Barbie bike dressed in her fairy outfit
Something else I did today
I fixed poor old Sniffy

Elizabeth won this little fella on side show alley in February and his poor nose fell off last night
It has now been reattached and hope it stays on a while longer
And now, because I have time, I can share with you some of the techniques I used to make the three pages using my kit from Love Scrappin’
To start with I took each of the pieces of pattern paper and cut them down to 8.5x11
I used the cut off scraps on each of the pages
I love it when you can use up all of a piece of paper but in a way that doesn’t ‘scream’ I used the same paper twice, something that seems to bother me lol
I love products that allow you to do more than just place it on the page, love getting bang for your buck :)
In the kit there are a few products that I used more than once
For example the Kaiser Rhinestone arrow
First thing I did was cut the arrow shape out of the backing sheet

I then placed the cut out arrow, with the rhinestones still attached, onto the My Minds Eye journal card

and sprayed red glimmer mist over the top, removing the arrow when the ink was dry, and then doodled around the arrow

I then used the other piece of backing, where the arrow had been removed, placed it on some of the scrap Pink Paislee paper and sprayed it with blue glimmer mist before adding the rhinestone arrow

Another example is the Scrapware heart, which varies in each kit, which I used with some scrap paper from an old envelope

I placed the heart on the paper and sprayed it with the blue glimmer mist

This I added to this page :)

I then took the chipboard heart and ‘coloured in’ the stars using a versa mark pen

While they were still wet I covered the stars with some embossing powder, a cotton bud is a great way to remove excess powder, just gently roll it over the area you want to ‘lift’ the powder from.

and then I just heated the powder to create this

which I used on this page.

Also on this page I used the Green Tara flower and the Prima stamp, which again varies in each kit.

I inked the stamp and just covered the flower to create some body and layering.

I also used the stamp on this page, up in the left corner, and on the shipping tag.

You can also see that I cut up the ‘sale’ tag and used both ends of it, on this page and the fairy page.
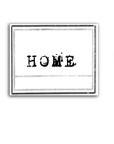
This last page I covered in gesso so to lift the photo off the page rather than have it get lost.
So there you go, and for $12 I think it’s a mighty fine kit, even if I do say so myself lol
There are still a couple left so if your interested make sure you don’t leave it too late :)
Wow Sharmaine - that's so clever and creative!! You never seize to amaze me! :)
ReplyDeleteWhat great ideas Sharmaine ... I like being able to get the most out of my kits too ... wouldn't have thought to cut out that arrow so neatly though! Cool.
ReplyDeleteAnd I grinned at Lucy's busy activities this morning! Very cute :-)
Cool technique. You're really creative Sharmaine!
ReplyDeleteBy the way ... you been awarded "Love Ya Award" by me!
http://bieho.blogspot.com/2009/07/love-ya-award.html
Thanks for sharing these awesome projects....I can't wait to try them out!!!! You are one talented lady!!! Thanks for keeping in touch with me and the inspiring comments you leave!!! I am so glad that we have one another in our lives!!!! Have a wonderful day!!!! :)
ReplyDeleteHi Sharmaine These pages are great, very creative. I love the way you can extend your supplies and still give a variety of looks for your pages. Lucy looks very cute in her dress, me Lucy wears fairy dresses around the house most days. Belinda
ReplyDeleteThanks for your support yesterday with my robbery...I truly appreciate it! :):):):) love u girl! loveeee the photos and loving the techniques! :):):):)
ReplyDeleteThank you for sharing your tecnique..I love your style!
ReplyDeleteLOVE all of those tips and ideas! i might have to try that out!
ReplyDeletehugs,
sarah.
Great visiting your blog! Thanks for the tutorials! I think I will use a few of them! Have a happy one!
ReplyDeleteoooooo !!! - love all the casualness & fun in your latest offerings. It was fun to follow your thinking process too...
ReplyDelete